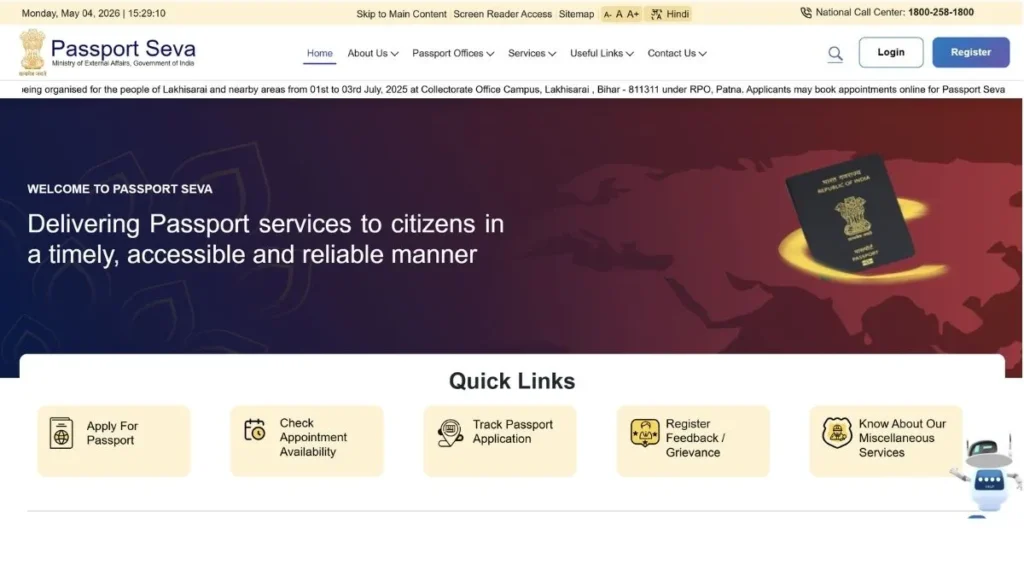
The Passport Seva initiative by the Government of India has revolutionized the way Indian citizens apply for and manage their passports. This comprehensive digital platform makes travel document services accessible, transparent, and efficient. Whether you’re applying for a new travel document, seeking renewal, or simply checking your application progress, this online portal is your one-stop solution for all passport-related needs.
Passport Related Services
Services Like New Registration, Apply New Passport, Renew Passport, status check and track for citizen.
What is Passport Seva Portal?
The official government website (passportindia.gov.in/psp) is designed to streamline passport services across India. Launched by the Ministry of External Affairs in partnership with Tata Consultancy Services, this platform has transformed the traditional application process into a hassle-free digital experience. Applicants can complete their entire journey from home, reducing the need for multiple visits to government offices.
The portal offers multiple services including fresh applications, reissue requests, online appointment booking, real-time status tracking, and secure document management. With over 400+ Passport Seva Kendras and Post Office Passport Seva Kendras across the country, the government has ensured accessibility for citizens in both urban and rural areas.
How to Access Your Account
To begin using the online system, visit passportindia.gov.in/psp and click on “Existing User Login” if you already have an account. Enter your registered email ID or username, password, and complete the captcha verification to access your dashboard.
For first-time users, click “New User Registration” and provide essential details like your name, date of birth, email address, and create login credentials. This secure authentication process ensures safe access to your personal information and application tracking.
Applying for Indian Passport Online
The passport application process through the digital portal is comprehensive yet user-friendly. Follow this detailed step-by-step guide to ensure a smooth application experience:
Step 1: Register on the Portal
Before starting your application, you need to create an account on the official website:
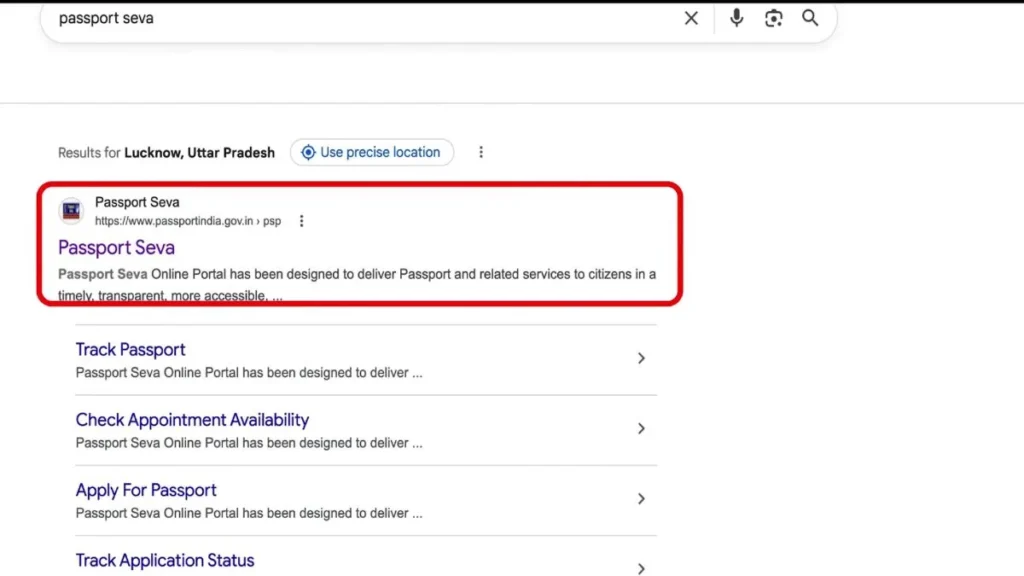
- Open your browser and search for “Passport Seva” or directly visit passportindia.gov.in/psp
- Under the “Quick Links” section on the homepage, click on “Apply for Passport”
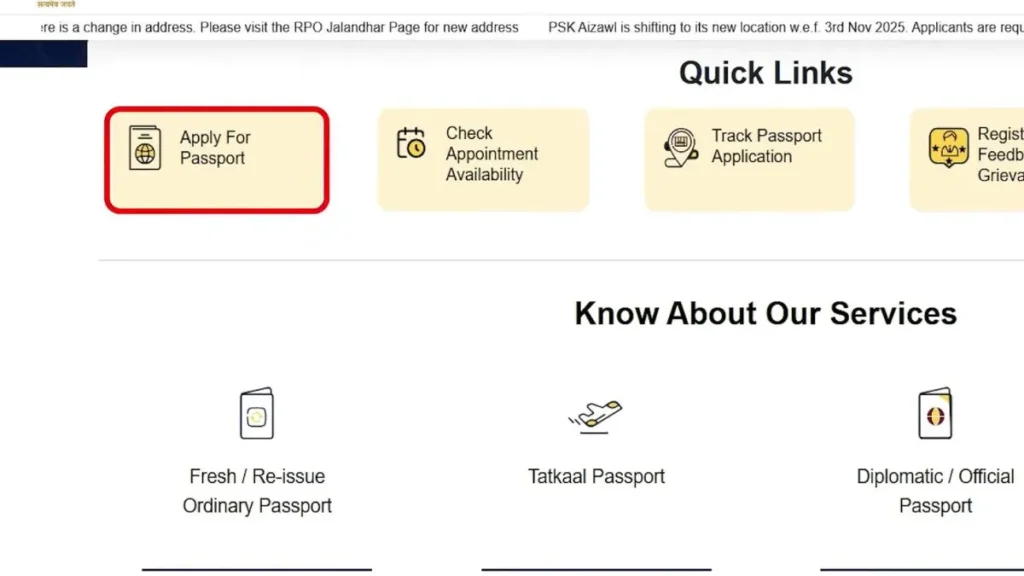
- Select “Normal” from the available options
- Click on “Register Now” to create your account

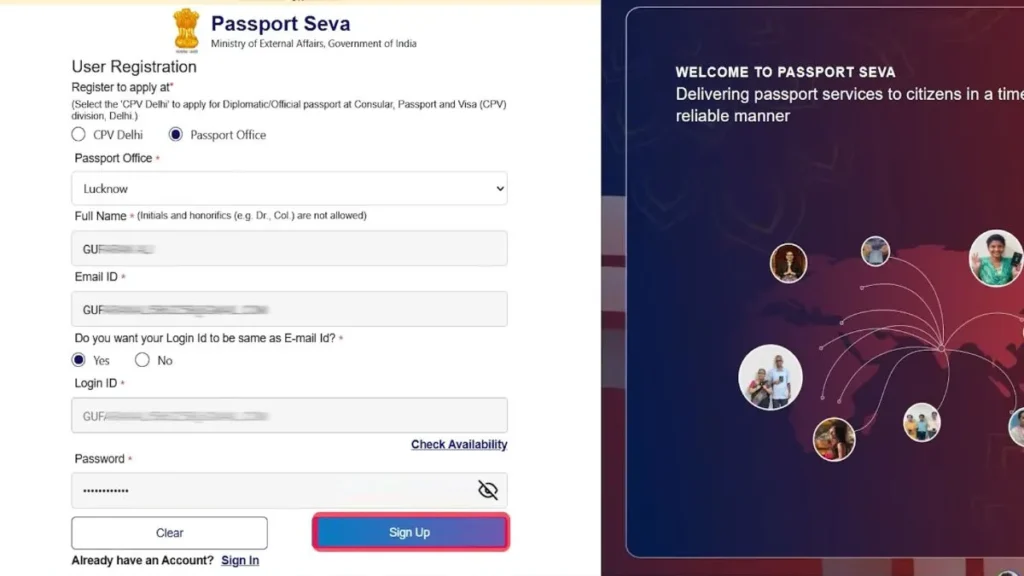
Creating Your Account:
- Select “Passport Office” (CPV Delhi is only for diplomatic passports or government officials)
- Choose your nearest passport office from the dropdown list
- Enter your full name as per official documents
- Provide your active email ID
- When asked if you want to use your email as Login ID, select “Yes” – this eliminates the need to remember a separate username
- Click “Check Availability” to verify your email is available
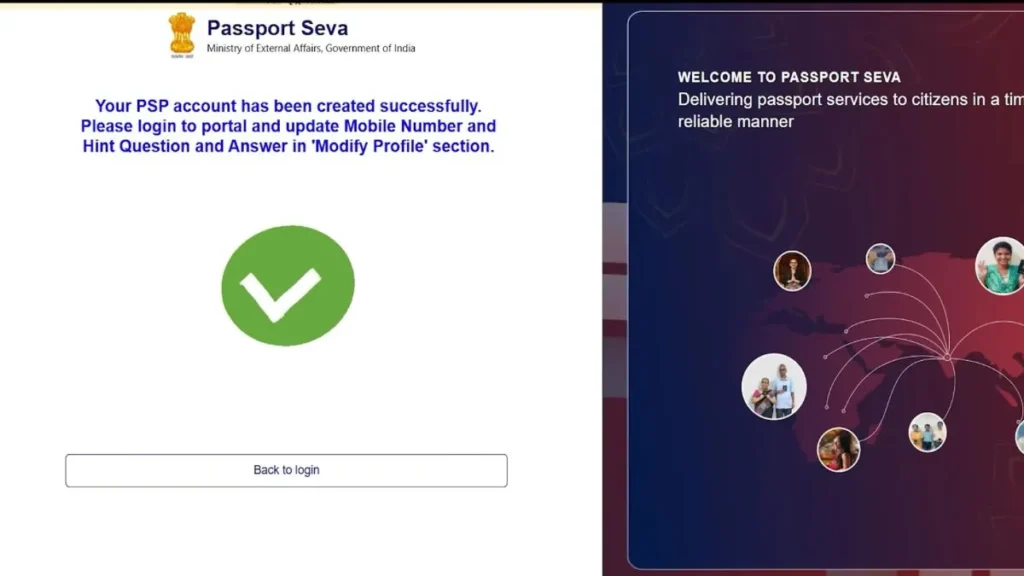
- Create a strong password and complete the sign-up process
Email Verification: Check your email inbox for a verification code sent by the Passport Department. Enter this code on the verification page and click “Complete Sign Up.” Your account is now created and ready to use.
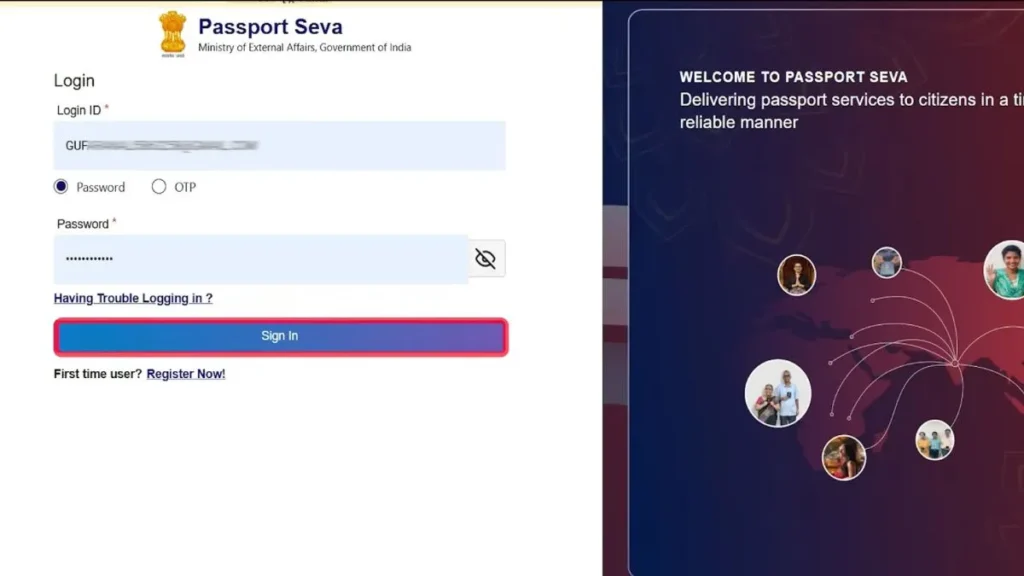
Step 2: Login and Start Your Application
- Return to the login page and enter your registered email ID
- You can login using either password or OTP – enter your password
- Click “Sign In” to access your dashboard
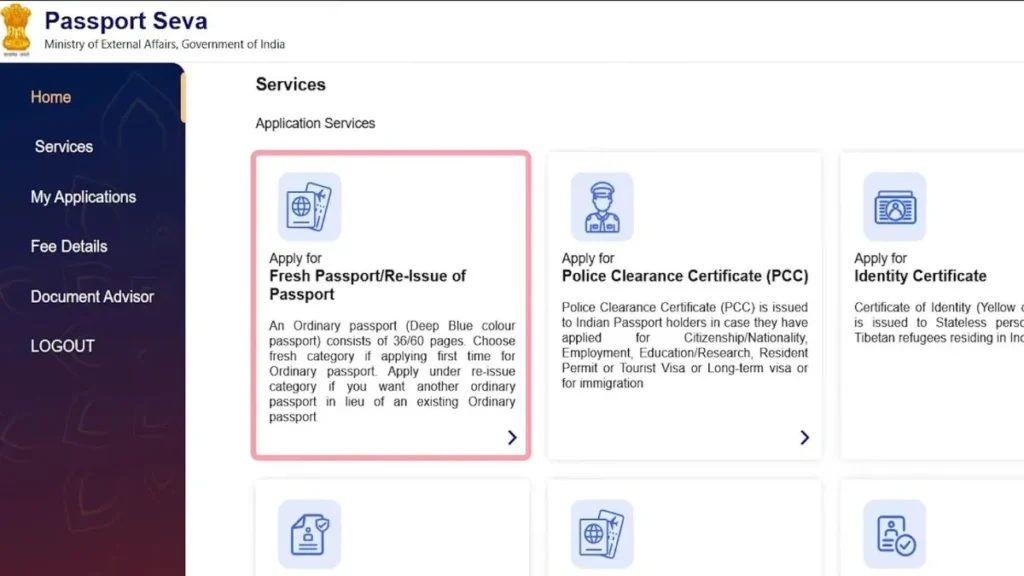
- Click on “Fresh Passport” option
- Select “Skip for Now” if prompted for additional information
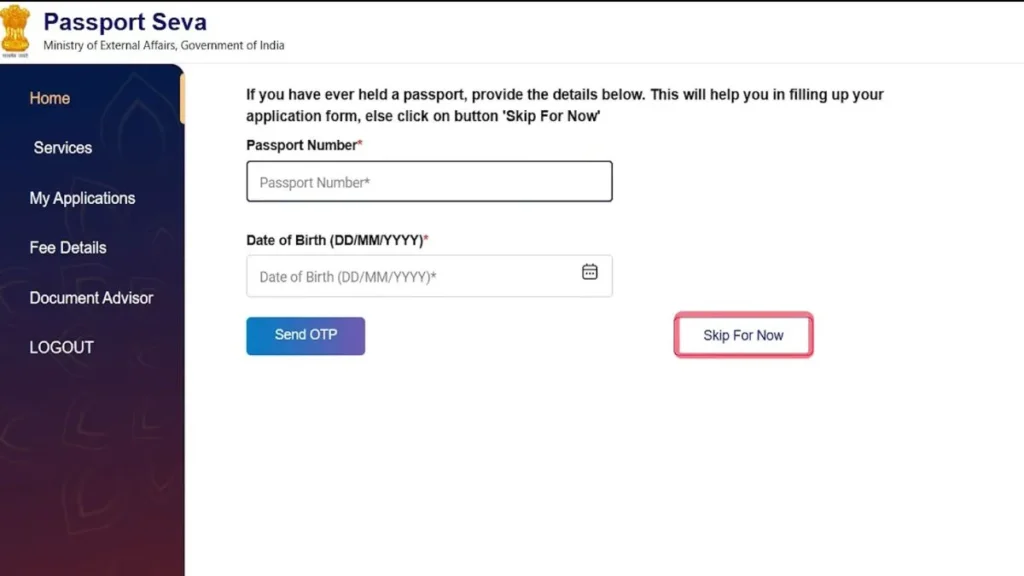
- Click “Next” to proceed
Step 3: Select Application Type and Details
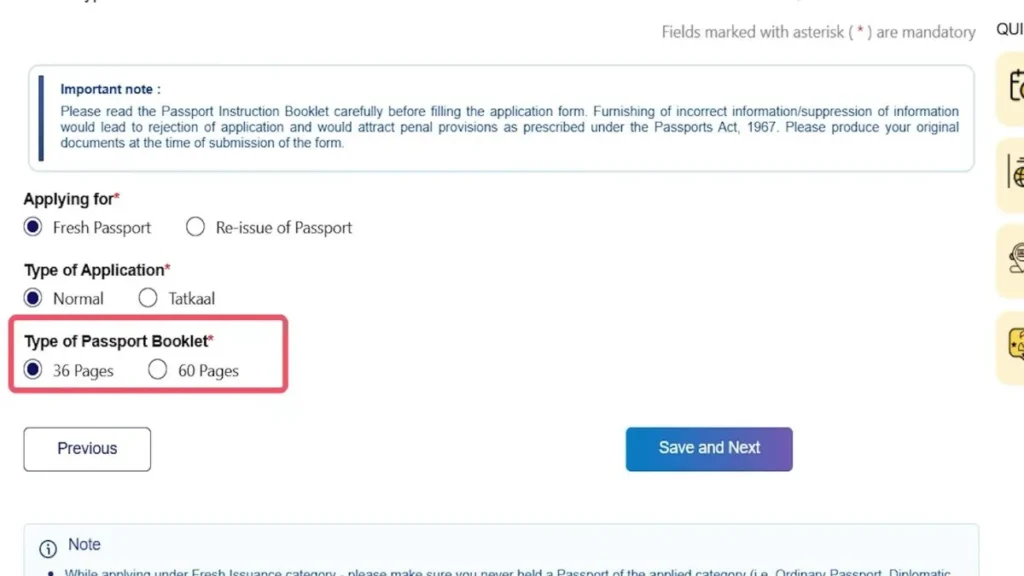
Choose Your Application Category:
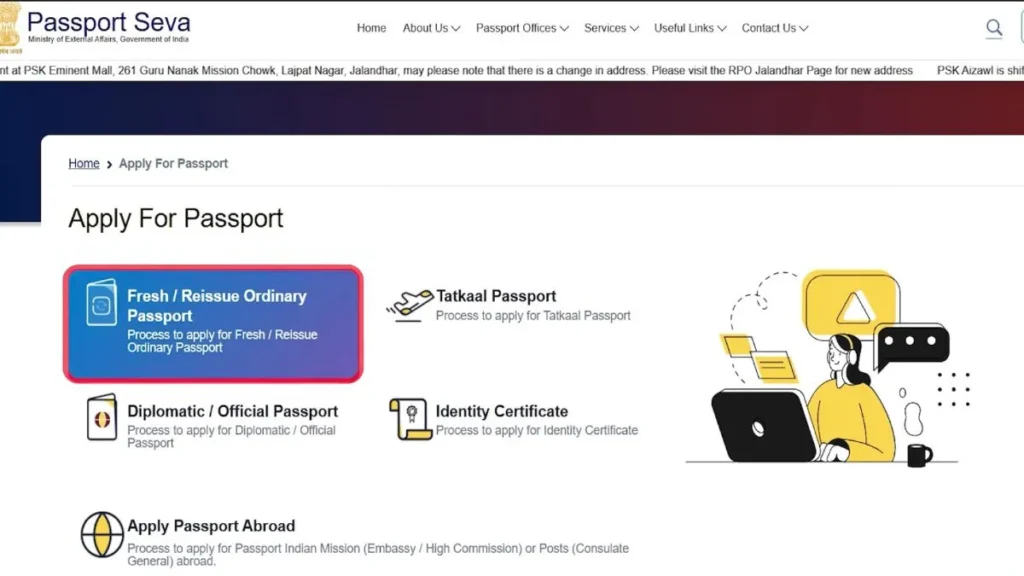
- Type of Application: Select “Fresh Passport” (for new applications)
- Service Type: Choose between Normal or Tatkal
- Normal: ₹1,500 fee, processing takes 30-45 days
- Tatkal: ₹3,500 fee (₹2,000 extra), processing within 7-10 days, requires additional documents
- Booklet Type: Select 36 pages (standard) or 60 pages (for frequent travelers – additional fee applies)
- Click “Save and Next”
Step 4: Fill Personal Information
Name Details:
- Enter First Name and Middle Name exactly as per your documents
- Add Surname if applicable
- Select your Gender (Male/Female/Transgender)
- Indicate if you’ve ever been known by any other name
- Specify if you’ve changed your name in the past
Date and Place of Birth:
- Click the calendar icon and select Year, Month, and Date
- In “Place of Birth,” enter the village/town/city where you were born (this may differ from your current address)
Marital and Citizenship Status:
- Select your current marital status (Married/Unmarried/Divorced/Widowed)
- When asked “Is your place of birth outside India?” – select No (if born in India)
- Choose your State and District of birth
- Select “Citizenship of India” – choose “By Birth” if you’re Indian by birth
Additional Information:
- Enter PAN Card number (optional but recommended)
- Enter Voter ID Card number (optional)
- Select Employment Type:
- Government Servant
- Private Service
- Self Employed (for business owners)
- Homemaker
- Student
- Retired
- Others
Important Note on Education: Your educational qualification determines your passport category:
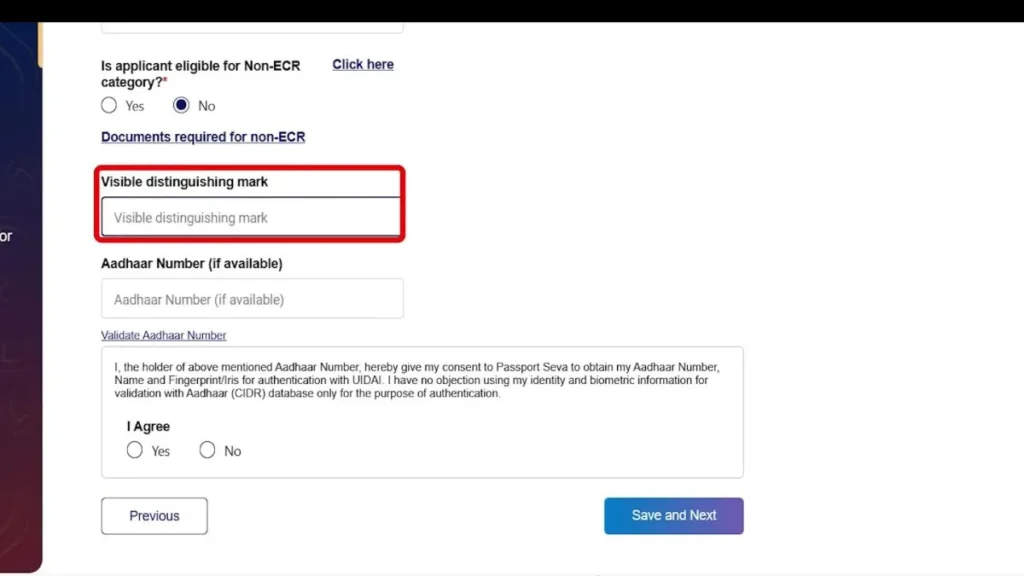
- 10th Pass or Above: You’ll receive a Non-ECR (Emigration Check Not Required) passport
- Below 10th: ECR category passport (requires emigration clearance for Gulf countries)
- Non-ECR passports don’t require immigration clearance for employment in Gulf countries, though both work the same for tourist visas
- Select your highest educational qualification from the dropdown
- Indicate if any parent/spouse is a Government Servant
- Enter visible identification marks on your body (birthmarks, moles, scars – optional)
- Enter your Aadhaar Number (mandatory)
- Accept Aadhaar terms and conditions by clicking “Yes”
- Click “Save and Next”
Step 5: Family Details
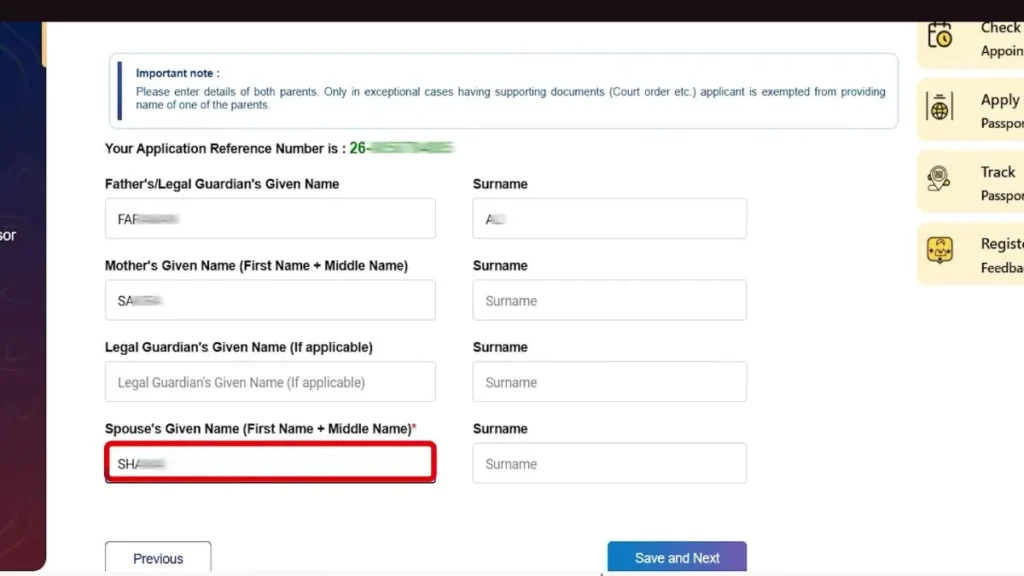
Father’s Details:
- Enter father’s First Name, Middle Name, and Surname
- Fill in exact spelling as per official records
Mother’s Details:
- Enter mother’s complete name
- Include surname if applicable
Legal Guardian:
- Only fill if applicable (for minors or special cases)
Spouse Details (for married applicants only):
- Women should enter husband’s name
- Men should enter wife’s name
- This section won’t appear if you selected “Unmarried”
Click “Save and Next” to proceed.
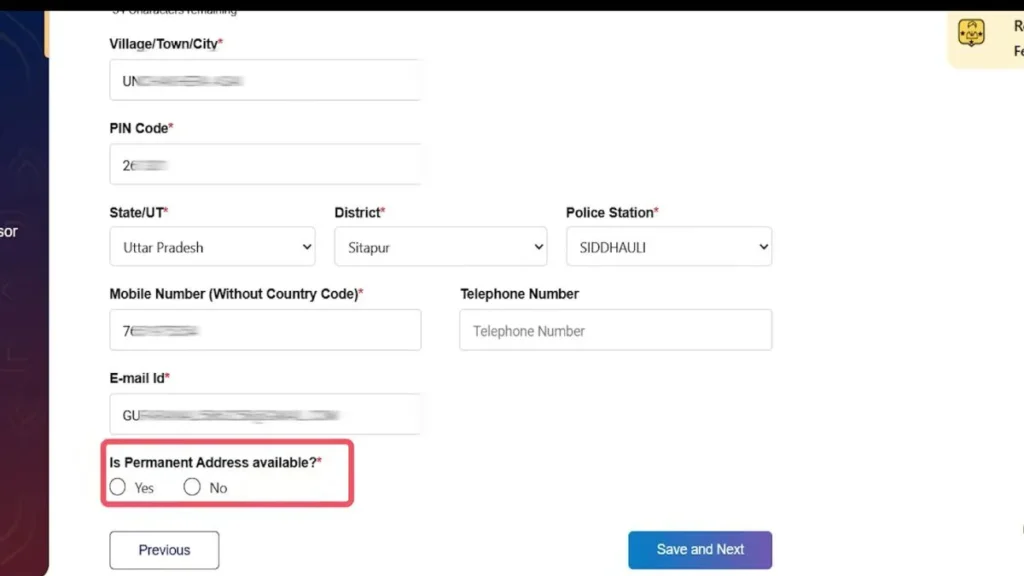
Step 6: Current Address (Critical Section)
Important: Your police verification will be conducted at this address, so ensure accuracy.
- Is your address outside India? – Select “No” (if residing in India)
- Enter House Number/Apartment Name/Building Name
- Enter Village/Town/City name
- Enter PIN Code – this will auto-populate State and District
- Select your State and District
- Select Police Station from the dropdown list – verification will be done by this station
- Enter Mobile Number (10 digits without country code)
- Enter Telephone Number (optional – most people skip this)
- Your registered email ID will auto-fill
Permanent Address:
- When asked “Is Permanent Address Available?”
- Select “Yes” if same as current address (recommended – most passport offices prefer matching addresses)
- Select “No” if different, then fill separate permanent address
- Click “Save and Next” and then “OK”
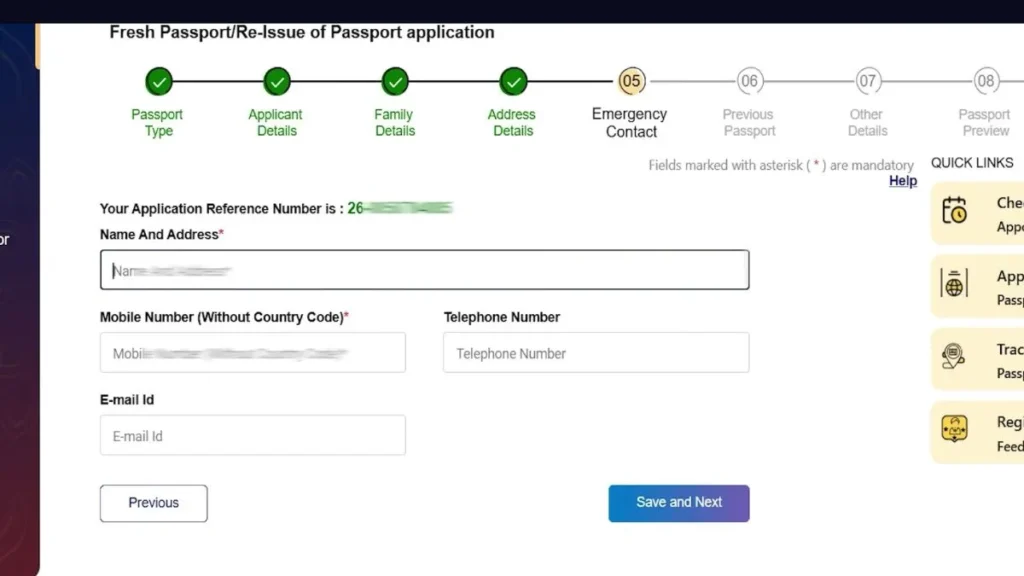
Step 7: Emergency Contact
Provide details of a family member who can be contacted in emergencies:
- Enter complete name and full address of your father/mother/sibling in a single line
- Include PIN code in the same line
- Enter their mobile number (can be same as yours if no other number available)
- Click “Save and Next”
Step 8: Answer Eligibility Questions
You’ll be asked several yes/no questions to determine eligibility:
- Has your passport ever been held/withheld/revoked?
- Have you ever applied for passport but not issued?
- Are there any criminal proceedings pending against you?
- Any court cases pending?
- Any orders prohibiting departure from India?
For a normal applicant, answer “No” to all these questions. Only select “Yes” if any condition genuinely applies to you.
Click “Save and Next” after answering all questions.
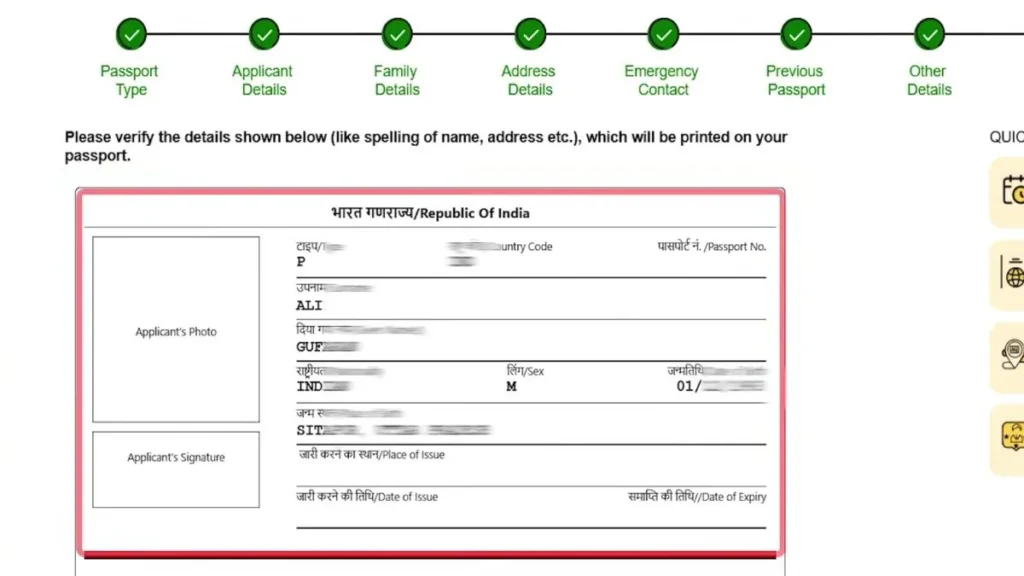
Step 9: Preview Your Application
A preview of your passport will appear showing how your information will look on the actual document:
- Your name, father’s name, mother’s name
- Date of birth
- Place of birth
- All personal details
Carefully verify all information. If you find any errors, go back and correct them before proceeding.
- Click “I Agree” to accept the declaration
- Click “Save and Next”
Step 10: Upload Required Documents
Select documents you’ll be submitting:
Proof of Birth (mandatory – choose one):
- Birth Certificate
- High School Certificate/Marksheet (10th)
- PAN Card
- Driving License
- Aadhaar Card
- Others as listed
Proof of Address (mandatory – choose one):
- Aadhaar Card
- Electricity/Water/Telephone Bill
- Bank Passbook
- Rent Agreement
- Ration Card
- Driving License
- Others as listed
Proof of Education (for Non-ECR passport):
- 10th Marksheet/Certificate
- 12th or Higher Education Certificates
Note: Your documents must be in your name. Select what you have and will submit at the Passport Seva Kendra.
Step 11: Submit Application
- Click “I Agree” to final declaration
- Enter “Place” – your current city/village name
- Date will auto-fill
- Click “Save”
- Click “OK” and review the complete preview
- Close preview window
- Click “Submit”
Your Application Reference Number (ARN) will be displayed – note it down carefully!
Step 12: Pay Application Fee
After successful submission, proceed to payment:
- Click on “Pay and Schedule Appointment”
- Select Passport Seva Kendra:
- Choose from PSK (Passport Seva Kendra) or POPSK (Post Office Passport Seva Kendra)
- POPSK are located in post offices – convenient for rural areas, no need to travel to big cities
- Check “Appointment Availability Dates” to see which dates are free at each center
- Select your preferred location
- Choose Appointment Date:
- Green colored dates on calendar are available
- Select a convenient date and time slot
- Reporting time will be 15 minutes before your scheduled slot
- Click “Make Payment”
- Scroll down and click “Pay Now”
Payment Process:
- You’ll be redirected to SBI Payment Gateway
- Choose payment method:
- UPI (Recommended – easiest option)
- Net Banking (PNB, ICICI, SBI, etc.)
- Debit Card
- Credit Card
- For UPI: Scan QR code with your payment app, ₹1,500 will auto-fill, enter PIN to complete
- Payment confirmation will appear
After successful payment, you’ll be automatically redirected back to the portal.
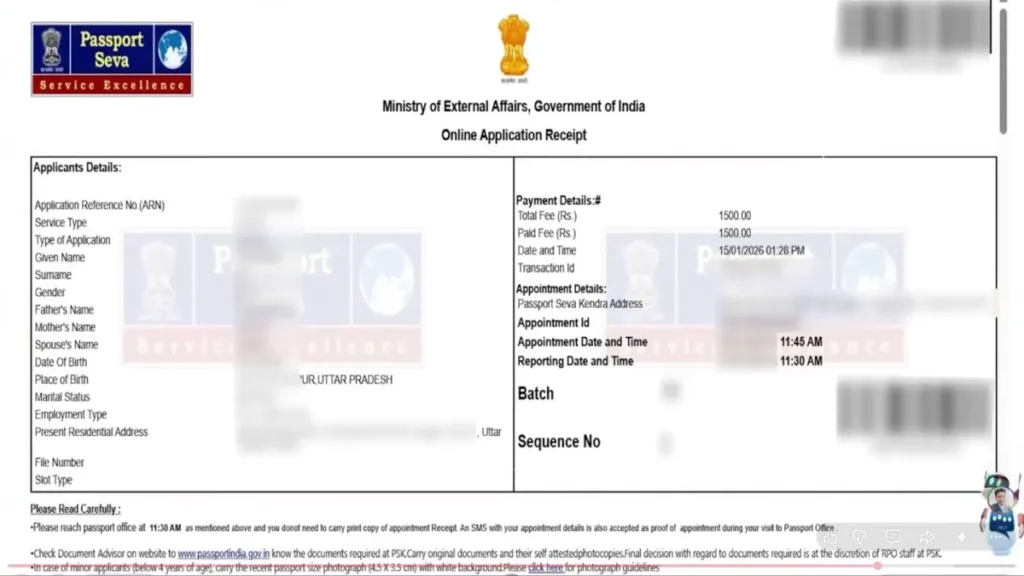
Step 13: Download Appointment Receipt
Your appointment slip will be generated showing:
- Appointment Date and Time
- Reporting Time (usually 15 minutes early)
- Passport Seva Kendra address
- ARN Number
- Required documents list
Print this appointment slip – you must carry it to your PSK visit.
Documents to Carry on Appointment Day
Create a document folder with:
- Printed application form (first page of appointment slip)
- Self-attested photocopies of all documents you selected (PAN, Aadhaar, Education certificates, etc.)
- Original documents for verification
- For Non-ECR passport: High School marksheet + higher education certificates (if available)
- Appointment receipt printout
What Happens at Passport Seva Kendra?
At the PSK:
- Your documents will be scanned and verified by officials
- Biometric data will be collected (fingerprints, photograph)
- Brief interview about your application details
- If everything is in order, your file will be “Granted” status on the spot
- The entire process at PSK takes 30-45 minutes
Police Verification Process:
- Within 1-2 days, your file is sent to the police station you selected
- Police verify you have no criminal records or pending court cases
- This process takes 7-15 days typically
- No additional fee is required – ₹1,500 is the complete government fee
- You may visit the police station to follow up politely and request timely completion
Passport Dispatch:
- Once police report is submitted, passport is printed within 1-2 days
- Dispatched via Speed Post
- Delivered to your registered address within 10-15 days from police clearance
The entire process from application to receiving your Indian passport takes approximately 30-45 days for normal applications.
Understanding Passport Photo Requirements
One of the most crucial aspects of your application is submitting photographs that meet specific guidelines. Incorrect photos are a common reason for application rejection:
Photo Specifications:
- Size: 2 inches x 2 inches (51mm x 51mm)
- Background: White or light-colored plain background only
- Recency: Photograph taken within last 6 months
- Face Coverage: 70-80% of the photo should be your face
- Expression: Neutral facial expression, eyes open, mouth closed
- Glasses: Avoid if possible; if worn, ensure no glare on lenses
- Head Covering: Not allowed except for religious reasons (must not obscure facial features)
- Attire: Avoid white clothing as it blends with background
- Quality: High resolution, sharp focus, no pixelation
- Lighting: Even lighting, no shadows on face or background
- Editing: No filters, retouching, or digital alterations
Common Photo Mistakes to Avoid:
- Smiling or showing teeth
- Red-eye effect from flash
- Shadows behind head
- Tilted head or side pose
- Wearing sunglasses or dark glasses
- Hat or cap (unless religious headwear)
- Blurred or low-quality images
- Old photographs (more than 6 months old)
Professional photo studios near Passport Seva Kendra locations are familiar with these requirements and can provide compliant photographs.
Passport Renewal – Quick Guide
If you already hold an Indian passport and need passport renewal, the process is streamlined:
When to Apply for Renewal:
- Passport validity has expired or expiring within 1 year
- All pages are exhausted
- Passport is damaged, mutilated, or torn
- Change in personal particulars (name, address, date of birth)
- Lost or stolen passport (requires police FIR)
Renewal Process:
- Login to your passport seva account
- Select “Re-issue of Passport”
- Choose reason: Validity Expired, Pages Exhausted, Damaged, or Change in Details
- Your previous details will auto-populate
- Update changed information (address, marital status if applicable)
- Upload current documents and recent photographs
- Pay renewal fee and book appointment
Renewal Benefits:
- Faster processing as you’re already in the system
- Police verification may be waived in certain cases (same address, no changes)
- Most personal details pre-filled from previous records
- Fee structure same as fresh passport (₹1,500 for normal, ₹3,500 for tatkal)
Track Your Application – Passport Status Check
Real-time passport tracking is one of the most useful features of the Passport Seva portal. Monitor your application progress 24/7:
Method 1: Through Your Account
- Perform passport seva login with your credentials
- Navigate to dashboard
- Click on “View Saved/Submitted Applications”
- Your current passport status will display with detailed stage information
Method 2: Using File Number (No Login Required)
- Visit passportindia.gov.in/psp homepage
- Click on “Track Application Status”
- Enter your File Number (ARN – Application Reference Number)
- Enter your Date of Birth (DD/MM/YYYY format)
- Complete captcha verification
- Click “Track Status” to view current stage
Method 3: SMS Tracking
Send SMS to 9704100100 in this format:
text
STATUS <File Number>
Example: STATUS AB12345678901234
You’ll receive an instant SMS reply with your current application stage.
Method 4: mPassport Seva App
Download the official mobile application:
- Available on Google Play Store and Apple App Store
- Login with same credentials
- Real-time notifications on status changes
- Track multiple applications simultaneously
Understanding Application Status Stages
When you check passport seva status, your application progresses through these stages:
- Application Submitted: Form successfully submitted, ARN generated
- Fee Payment Successful: Payment received, appointment can be scheduled
- Appointment Scheduled: Date and time confirmed at selected PSK
- Application Received at PSK: You’ve visited PSK, documents verified
- Documents Verified: All documents scanned and approved
- Granted: Application approved, proceeding to police verification
- Police Verification Initiated: File sent to police station
- Police Verification Completed: Clearance received from police
- Passport Printing: Your passport is being printed
- Dispatched: Sent via Speed Post to your address
- Delivered: Passport received at your address
Typical Timeline:
- Steps 1-6: Same day at PSK visit
- Step 7-8: 7-15 days (police verification)
- Step 9-10: 2-3 days (printing and dispatch)
- Step 11: 3-5 days (delivery)
If status remains unchanged for more than expected duration, contact the Passport Seva helpline.
Locating Your Nearest Passport Seva Kendra
With 400+ centers across India, finding your nearest Passport Seva Kendra is simple:
Online Method:
- Visit passport seva portal homepage
- Click “Locate PSK/POPSK” under Quick Links
- Select your State from dropdown
- Choose your District
- View complete list with:
- Center name and type (PSK/POPSK)
- Complete address with landmarks
- Contact phone numbers
- Operating hours
- Appointment availability
Types of Centers:
Passport Seva Kendra (PSK):
- Located in major cities and district headquarters
- Larger facilities with multiple counters
- Handle high volume of applications
- Extended working hours
Post Office Passport Seva Kendra (POPSK):
- Located within post office premises
- Available in smaller towns and rural areas
- More accessible, closer to home
- Same services as regular PSK
- Ideal for applicants in remote locations
Mobile Passport Seva Kendra:
- Temporary setups in far-flung areas
- Announced periodically by government
- Brings services to doorstep of remote citizens
Choosing Your Center:
Select based on:
- Proximity to your location
- Appointment availability
- Travel convenience
- Operating hours that suit your schedule
Frequently Asked Questions (FAQs)
-
How can I check my passport status online?
You can use the passport tracking feature on the official portal by entering your file number and date of birth.
-
What documents are required for passport application?
The documents required for passport generally include address proof, identity proof, and date of birth proof.
-
Can I reschedule my passport appointment?
Yes, you can reschedule your appointment through the passport seva login dashboard, subject to availability.
-
What is the standard passport photo size?
The standard passport photo size is 4.5 cm x 3.5 cm with a white background.
-
How long does passport renewal take?
Processing time for passport renewal depends on police verification and application type (normal or Tatkal).
-
Is it mandatory to visit a Passport Seva Kendra?
Yes, applicants must visit the selected passport seva kendra for biometric verification and document validation.